Nearly half of America has admitted that they are not able to park their car in the garage. The carport is one of the most requested organization and decluttering projects that homeowners seek assistance in getting done. The San Francisco Chronicle article about this issue shows the backward thinking that is employed by leaving one of your largest assets unprotected and on the street, your car, because the garage is a cluttered mess of items that don’t have nearly as much monetary value.
So, let’s turn that trend around and dedicate a day to organize the garage and turn that valuable home space into a desirable storage area that you are proud to show off and actually facilitate in the home management of our lives.
HOW TO BEGIN
- Set Aside A Full Day
- A typical garage takes anywhere from four to eight hours to organize.
- If you try to do it piecemeal it might never actually get finished.
- The process looks like:
- Pull everything out.
- Clean the space.
- Sort all items.
- Put things back.
If you try to declutter your garage in a couple of hours over a few days or weekends, you’ll never get ahead, the items you intend to get rid of may slowly filter back in, and every time you begin to declutter some more, you’ll likely have to start from scratch.
- Supplies
Make sure to have the following supplies on hand before beginning:
- Help – make sure you have a team of helpers ready to assist with the moving and organizing process. Not only does it make the whole thing move much faster, but it also makes the task easier, faster, and can actually be a fun hangout day with friends or family.
- If you need to hire labor for a day go ahead and put that into the plan.
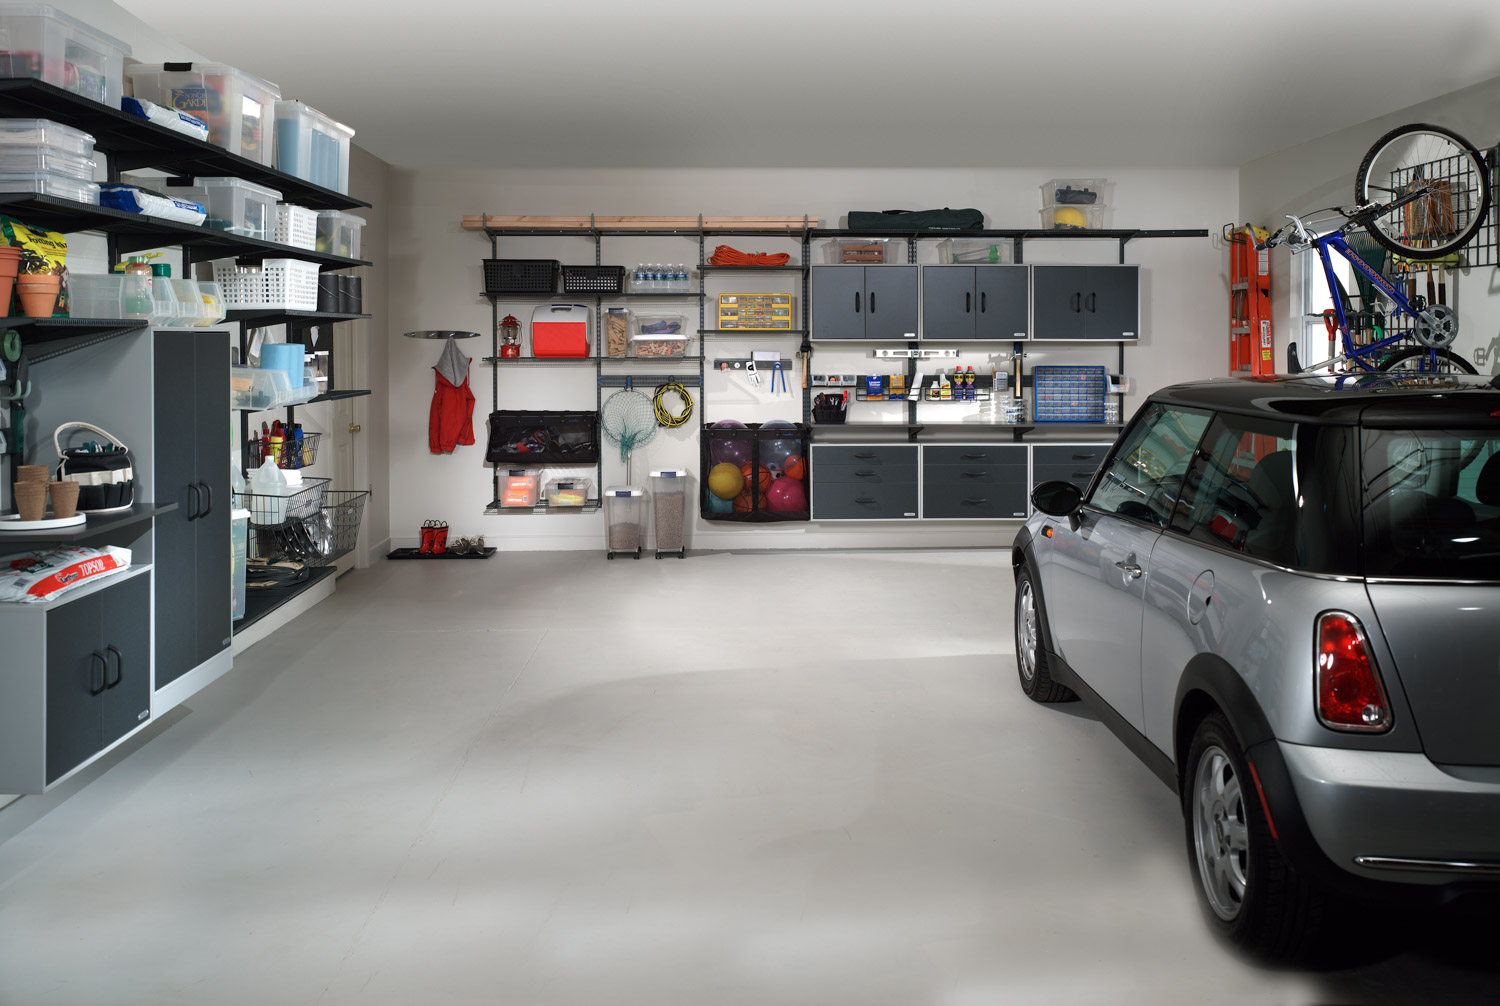
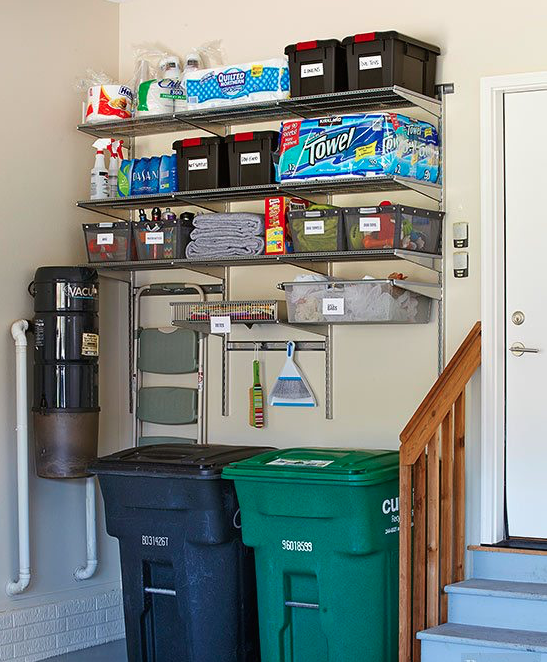
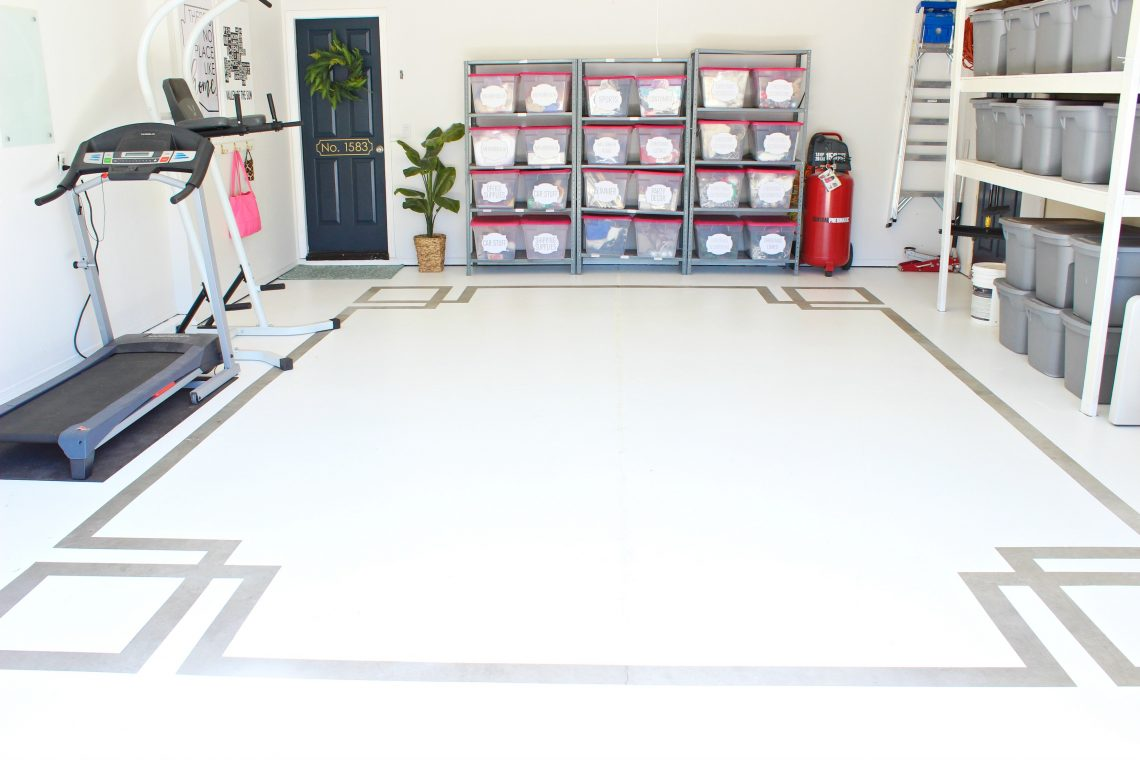
- Shelving units – having a place to store all your organized belongings is the whole point of this process so make sure you have some shelving units ready to install once you’ve cleared the garage.
- Easily adjustable, lightweight, and durable are qualities you’ll want to look for in your units.
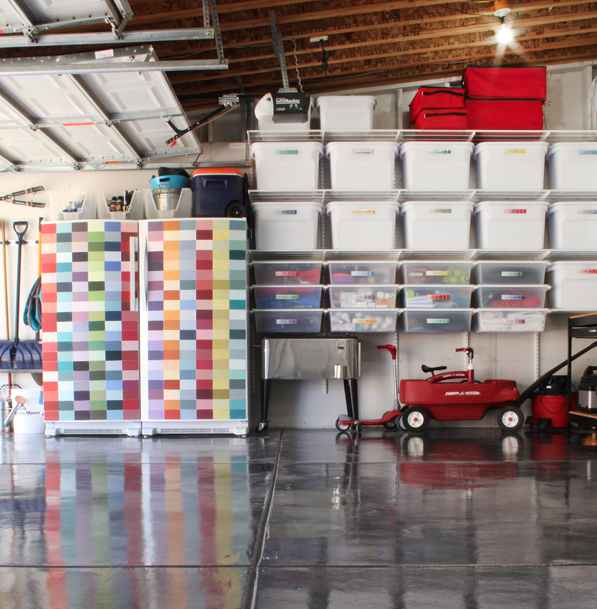
- Boxes, bins, containers – any time of box or bin you have on hand will work because you will be labeling them all. Most people prefer clear plastic storage bins for viewability.
- Make sure to have at least 10 on hand; you can always return what you don’t use, so buy more than you think you’ll need.
- Labels – if you have a label maker great, otherwise just some masking tape and permanent markers will work.
- Labeled bins and shelving give a clear indication of where you can find something as well as where it goes after it’s used.
- Disposal Plan
You will be organizing your items into three piles. Most items to recycle can go right into your curbside bins. Larger items put to the side for service pickup.
- Sell
- Donate (giveaway)
- Recycle
If you want to sell items yourself, here is a guide to follow for the best outlets and tips. If you want to donate the items to charity yourself, there are most likely many in your area that may offer to pick up for larger items (such as furniture and larger electronics of spring, exercise equipment). If you don’t want to deal with the hassle of any of this and want a one-stop service to do it all for you, a service like Remoov does just that. They will sell your item, then donate any items to charity that don’t sell (getting you a tax-deductible donation receipt in the process), and lastly, they will recycle or responsibly dispose of items that don’t fit the previous catagories.
THE PROCESS
- Take everything out. Pick a section of your garage to start with and pull everything out onto the driveway to sort through. This step allows you to see the space you have to work with and the type of storage that might work to reorganize the items you’re keeping.
- Clean all surfaces. First, sweep and vacuum. Cover the ground, tables, all along the walls, and ceiling (removing the cobwebs too). Next, wash the walls with a mild bleach solution. This is very effective for mold. Lastly, scrub the floor with hot water and a strong detergent. This will get rid of any tough stains on the floor.
- Install shelves. If you already have some boxes organized into categories, first take them out as well, then install shelves and replace. Make use of all the vertical space you have to help get your belongings stashed away.
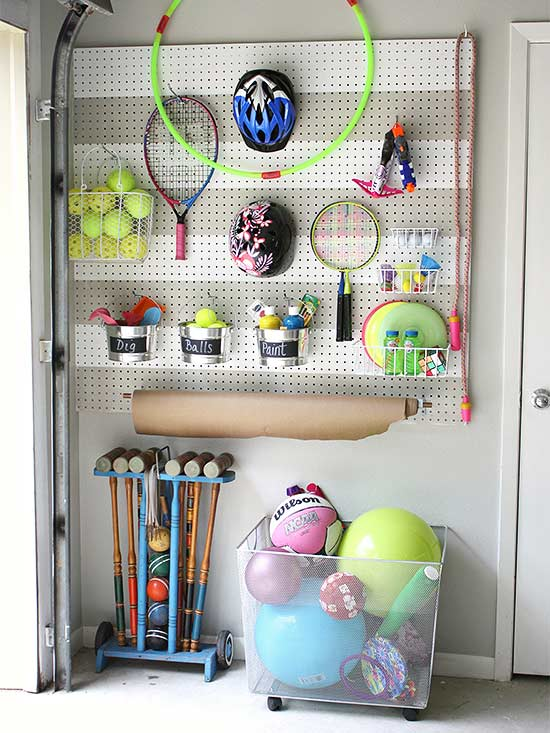
- Additional hooks or wall tracks are also great space organizers. Not only will this make maximum use of your space, but it’ll also make everything look a lot neater.
- Sorting– follow the categories your set-up: keep, sell, donate, or toss. Once you’re done sorting, start to place the “keep” back into the garage in their proper categories.
- Categories– Before you put everything you need back into your clean garage, you need to divide it into different zones.
- Having categories of items makes it much be easier to not only find the things you need quickly but to also keep them organized.
- Thus, cleaning your garage won’t be something you have to do all that often anymore.
- Where should they go? Different categories you might consider include:
- Kids’ toys– make those easily accessible for the children to get to.
- Tools– most often used up front, others in the back.
- Decorations– make a holiday section, which can include birthdays, as well as all the other major holidays you celebrate.
- Sports equipment
- Home decor
- Memorabilia
Disposal Plan
This was touched upon before, but having a plan in place on how you will be disposing of your unwanted items, before you begin, is essential for a positive and successful outcome. You’ll hopefully have many items for trash and donation.
- If you feel certain that you will have a good deal of items that you want to sell and or donate, and you don’t have the time or don’t want to take the time to deal with this process, set up the selling and removal service from Remoov.
- Otherwise, make sure you have a plan on how to sell and donate as well as properly recycle any unwanted belongings.
- This ensures the items are taken away immediately and don’t linger on-site for you to have second thoughts or for them to creep back into the garage.
Summary
Once your garage is organized you’ll be amazed at how much space you have and how easy it is to find what you need. Before you know it, you’ll be making plans to convert your garage into a music studio or setting up a small workshop instead of just watching clutter build up. With the appropriate equipment, you will have a proper place to put everything back in its space. You may have to make some adjustments, as what you envision may not always work out. However, with a little trial and error, you’re sure to find the right home for everything and end up with a clean and uncluttered garage in the end. So, take some time for a garage transformation, and you’ll see that it pays off.
#organizing #organization #declutter #organized #getorganized #professionalorganizer #homeorganization #organize #organizedhome #organizingtips #organizedlife #decluttering #organizer #home #homeorganizer #simplify #clutterfree #cleaning #organizingideas #organizeyourlife #storage #homeorganizing #declutteryourlife #homedecor #tidy #mariekondo #organizinghacks #declutteryourhome #organizingtips #tidy #home #organizer #storage #minimalism #organizeyourlife #declutteringtips #homeorganizing #tidyingup #declutteringmylife #minimalist #garage